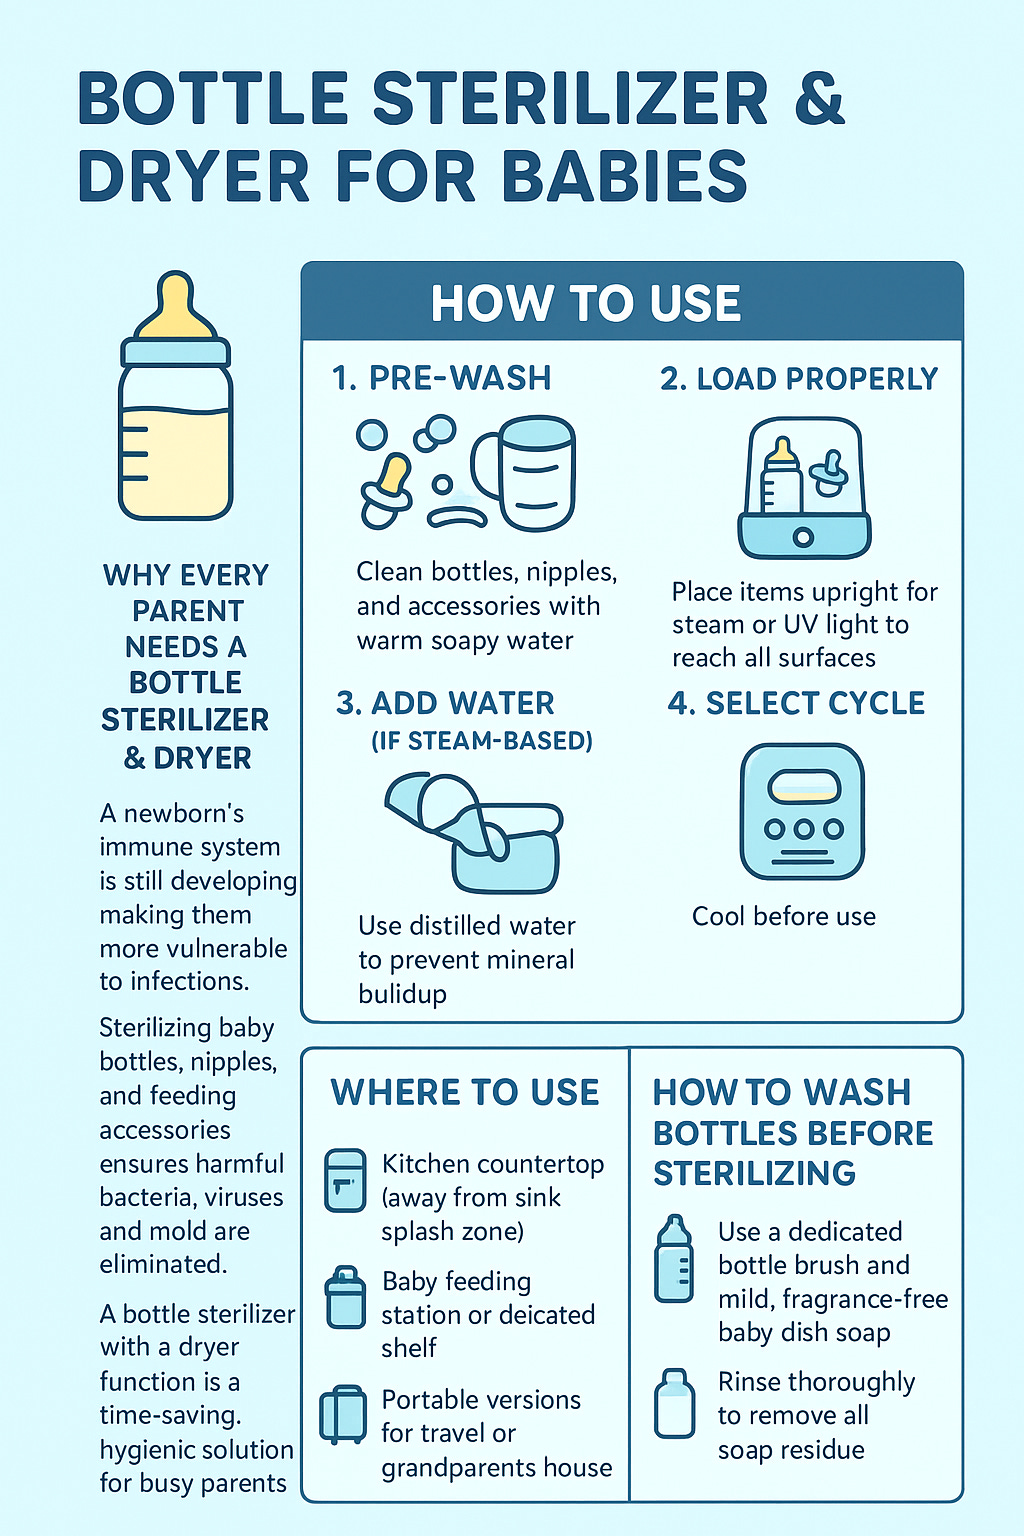
🍼 Why Use a Bottle Sterilizer & Dryer?
Newborns have delicate immune systems, and sterilizing feeding items helps protect them from harmful bacteria, viruses, and mold. A sterilizer and dryer combo not only cleans but also ensures bottles are dry, preventing moisture-related bacterial growth.
🧼 Types of Bottle Sterilizers
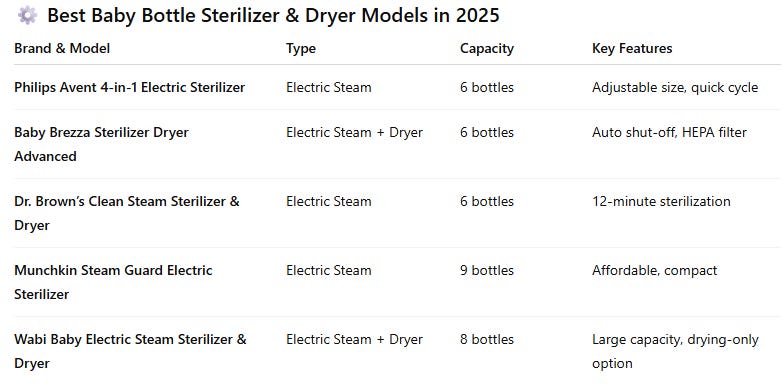
1. Electric Steam Sterilizers
- Use steam to kill up to 99.9% of germs.
- Quick (5–15 minutes) and chemical-free.
2. Microwave Steam Sterilizers
- Portable and affordable.
- Great for small spaces or travel.
3. UV Sterilizers
- Use ultraviolet light to kill germs.
- Ideal for items that can’t be boiled or steamed.
🧼 How to Wash Bottles Before Sterilizing
- Use a dedicated bottle brush and mild, fragrance-free baby dish soap.
- Rinse thoroughly to remove all soap residue.
- Shake off excess water before placing in sterilizer.
🔹 How to Use a Bottle Sterilizer & Dryer
- Pre-wash: Clean bottles, nipples, and accessories with warm soapy water.
- Load Properly: Place items upright for steam or UV light to reach all surfaces.
- Add Water (if steam-based): Use distilled water to prevent mineral buildup.
- Select Cycle: Choose sterilize + dry for maximum hygiene.
- Cool Before Use: Let items cool before feeding your baby.
⚠️ Safety Precautions
- Always unplug before cleaning the unit.
- Avoid overfilling with water.
- Descale monthly to prevent limescale buildup.
- Only sterilize items labeled BPA-free and sterilizer-safe.
- Keep out of children’s reach during operation.
💡 Extra Tips
- Sterilize pacifiers, teething rings, and breast pump parts too.
- For newborns, sterilize after every use; after 6 months, once a day may be enough.
- Store sterilized bottles in a clean, covered container if not used immediately.
A quick Guide